Authorizations
An authorization is a way to collect credentials from customers, which are then sent to your connector
through the X-Unito-Credentials header. There are two main categories of Authorizations types and a connector
can define multiple authorizations of different types in its configuration.
Custom
A custom credential encompass API keys, username & password, or any other credential that require collecting information through a form. For example, an authorization to collect an API key looks like;
{
  "authorizations": [
    {
      "name": "apiKey",
      "method": "custom",
      "variables": {
        "apiKey": {
          "type": "password",
          "required": true,
          "label": "Your API key"
        }
      }
    }
  ]
}
Collect information with variables
In a custom authorization, data is collected by using variables.
The following properties are available:
| Property | Description | Required |
|---|---|---|
type | The data type of the variable. Valid values are: boolean, number, password, string, text. | Yes |
format | The string format the value of the variable must comply to. Valid values are: email, uri. Applies only if type is string. | No |
pattern | The regular expression a string value must match. Applies only if type is string. | No |
label | The text to display to the user on the form before the input field. Defaults to the name of the variable if not specified. | No |
required | Whether this variable must be specified by the user to continue. Defaults to false. | No |
defaultValue | If specified, the input field will be prefilled with this value. | No |
placeholder | Displayed as a hint in the input field. | No |
help | Text displayed before the input field with instructions to the user. | No |
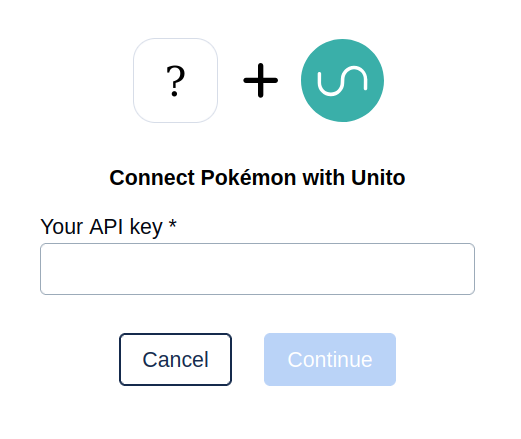
When clicking on Connect account on your connector in the Unito app, customers will see the following form;

To support this configuration, your connector needs to be coded to receive the following data in the
X-Unito-Credentials header;
{
  "apiKey": "<api key collected from the customer>"
}
OAuth 2
An OAuth 2 credential complies to the RFC6749 to collect credentials from customers.
For example:
{
  "authorizations": [
    {
      "name": "oauth2",
      "method": "oauth2",
      "oauth2": {
        "clientId": "<obtained from the provider>",
        "clientSecret": "<obtained from the provider>",
        "authorizationUrl": "<obtained from the provider>",
        "grantType": "authorization_code",
        "tokenUrl": "<obtained from the provider>"
        "scopes": [{ "name": "<obtained from the provider>" }]
      }
    }
  ]
}
To support this configuration, your connector needs to be coded to receive the following data in the
X-Unito-Credentials header:
{
  "accessToken": "<token collected from the customer>"
}
You don't need to handle refreshing access tokens. Unito tries to automatically refresh access tokens whenever possible.
The following properties are available:
| Property | Description |
|---|---|
clientId | The Client Id obtained from the provider. |
clientSecret | The Client Secret obtained from the provider. |
authorizationUrl | The URL to grant or deny access to the user account. |
tokenUrl | The URL to obtain or refresh an access token. |
grantType | The type of grant of the OAuth 2 authorization |
scopes | The requested scope of access to the user account. |
tokenRequestParameters | Extra information used to obtain an access token. |
refreshRequestParameters | Extra information used to refresh an access token. |
requestContentType | The content type of requests to the provider. |
responseContentType | The content type of responses from the provider. |
Supported Grants
The supported grant types are:
Authorization Code
Example:
{
  "authorizations": [
    {
      "name": "oauth2",
      "method": "oauth2",
      "oauth2": {
        "clientId": "<obtained from the provider>",
        "clientSecret": "<obtained from the provider>",
        "authorizationUrl": "<obtained from the provider>",
        "grantType": "authorization_code",
        "tokenUrl": "<obtained from the provider>",
        "scopes": [{ "name": "<obtained from the provider>" }]
      }
    }
  ]
}
Password Grant
In this grant, the variables username and password are required.
Example:
{
  "authorizations": [
    {
      "name": "oauth2",
      "method": "oauth2",
      "variables": {
        "username": {
          "type": "string",
          "required": true
        },
        "password": {
          "type": "password",
          "required": true
        }
      },
      "oauth2": {
        "clientId": "<obtained from the provider>",
        "clientSecret": "<obtained from the provider>",
        "authorizationUrl": "<obtained from the provider>",
        "grantType": "password",
        "tokenUrl": "<obtained from the provider>"
        "scopes": [{ "name": "<obtained from the provider>" }]
      }
    }
  ]
}
Client Credentials
In this grant:
- the variables
clientIdandclientSecretare required. - the
oauth2.clientIdandoauth2.clientSecretmust be omitted. - the variables
clientIdandclientSecretmust be sent in the header or body of requests.
Example:
{
  "authorizations": [
    {
      "name": "oauth2",
      "method": "oauth2",
      "variables": {
        "clientId": {
          "type": "string",
          "required": true
        },
        "clientSecret": {
          "type": "password",
          "required": true
        }
      },
      "oauth2": {
        "grantType": "client_credentials",
        "scopes": [{ "name": "<obtained from the provider>" }],
        "tokenUrl": "<obtained from the provider>",
        "tokenRequestParameters": {
          "header": {
            "Authorization": "Basic {!base64({+clientId}:{+clientSecret})}"
          }
        },
        "refreshRequestParameters": {
          "header": {
            "Authorization": "Basic {!base64({+clientId}:{+clientSecret})}"
          }
        }
      }
    }
  ]
}
JWT Bearer
Example:
{
  "authorizations": [
    {
      "name": "oauth2",
      "method": "oauth2",
      "oauth2": {
        "clientId": "<obtained from the provider>",
        "clientSecret": "<obtained from the provider>",
        "authorizationUrl": "<obtained from the provider>",
        "grantType": "urn:ietf:params:oauth:grant-type:jwt-bearer",
        "tokenUrl": "<obtained from the provider>",
        "scopes": [{ "name": "<obtained from the provider>" }]
      }
    }
  ]
}
Secure the clientSecret
The clientSecret field of your OAuth2 authorization must be encrypted. Encrypting this secret is done with the
encrypt command of the CLI.
For example, if your secret is MyClientSecret, you can do:
echo "MyClientSecret" | integration-cli encrypt
The CLI will gives you back a string that looks like:
unito-secret-v1://U2FsdGVkX1/x+nU8YiX+7VlOceI2MSJl4m4fHGlvzsLXFkhjhU37rZgDGrScuivS
You then need to modify your authorization as follow:
{
  "authorizations": [
    {
      "name": "oauth2",
      "method": "oauth2",
      "oauth2": {
        "clientId": "<obtained from the provider>",
        "clientSecret": "unito-secret-v1://U2FsdGVkX1/x+nU8YiX+7VlOceI2MSJl4m4fHGlvzsLXFkhjhU37rZgDGrScuivS",
        "authorizationUrl": "<obtained from the provider>",
        "grantType": "authorization_code",
        "tokenUrl": "<obtained from the provider>",
        "scopes": [{ "name": "<obtained from the provider>" }]
      }
    }
  ]
}
Collect information with variables
It is possible to collect additional data with OAuth 2, by using variables.
For example:
{
  "authorizations": [
    {
      "name": "oauth2",
      "method": "oauth2",
      "variables": {
        "workspace": {
          "type": "string",
          "label": "Your workspace"
        }
      }
      "oauth2": {
        "clientId": "<obtained from the provider>",
        "clientSecret": "<obtained from the provider>",
        "authorizationUrl": "<obtained from the provider>",
        "grantType": "authorization_code",
        "tokenUrl": "<obtained from the provider>"
        "scopes": [{ "name": "<obtained from the provider>" }]
      }
    }
  ]
}
To support this configuration, your connector needs to be coded to receive the following data in the
X-Unito-Credentials header:
{
  "accessToken": "<token collected from the customer>",
  "workspace": "<data collected from the customer>"
}
Note that in the example above, workspace is NOT required, which means your connector must also support
receving an undefined workspace.
Tweak requests
As you will see in the following sections, collected variables can then be used to tweak requests.
The following operations are available:
| Operation | Description |
|---|---|
{+variable} | interpolate the value of the variable in the string. |
{!base64(<content>)} | base64-encode the value of <content>, which can include variables. |
For example, when the value of workspace is 'awesome':
Your {+workspace} workspace=>Your awesome workspace.Your {!base64({+workspace})} workspace=>Your YXdlc29tZQ== workspace.
Tweak the Authorization request
When needed, Unito makes an HTTP call to the authorizationUrl you provided in your
configuration to obtain an authorization grant.
You can use variables to tweak this URL. For example:
{
  "authorizations": [
    {
      "name": "oauth2",
      "method": "oauth2",
      "variables": {
        "workspace": {
          "type": "string",
          "label": "Your workspace"
        }
      }
      "oauth2": {
        "authorizationUrl": "https://{+workspace}.provider.com/oauth2/authorize"
      }
    }
  ]
}
Tweak the Access Token request
During the OAuth2 flow, Unito makes an HTTP call to the tokenUrl you provided in your
configuration to obtain an initial access & refresh tokens.
Some providers go beyond the standard and may require:
- A dynamic
tokenUrl, for example:https://{+dynamic}.provider.com/oauth2/token. - An additional static or dynamic
query paramintokenUrl, for example:https://api.provider.com/oauth/token?static=true&dynamic={+dynamic}. - An additional static or dynamic parameter in the
bodyof the request. - An additional static or dynamic parameter in the
headerof the request.
All of the above use cases are handled in the properties of your OAuth2 configuration by using a mix of variables
and tokenRequestParameters properties. The following examples cover those cases.
A dynamic tokenUrl
{
  "authorizations": [
    {
      "name": "oauth2",
      "method": "oauth2",
      "variables": {
        "domain": {
          "type": "string",
          "label": "Your domain"
        }
      }
      "oauth2": {
        "tokenUrl": "https://{+domain}.provider.com/oauth2/token"
      }
    }
  ]
}
An additional static or dynamic query param in tokenUrl
{
  "authorizations": [
    {
      "name": "oauth2",
      "method": "oauth2",
      "variables": {
        "domain": {
          "type": "string",
          "label": "Your domain"
        }
      }
      "oauth2": {
        "tokenUrl": "https://api.provider.com/oauth2/token?domain={+domain}"
      }
    }
  ]
}
An additional static or dynamic parameter in the body or header of the request
{
  "authorizations": [
    {
      "name": "oauth2",
      "method": "oauth2",
      "variables": {
        "domain": {
          "type": "string",
          "label": "Your domain"
        },
        "apiVersion": {
          "type": "string",
          "label": "API version"
        }
      }
      "oauth2": {
        "tokenUrl": "https://api.provider.com/oauth2/token",
        "tokenRequestParameters": {
          "body": {
            "domain": "{+domain}", // dynamic value in the body.
            "verbose": true        // static value in the body.
          },
          "header": {
            "X-API-VERSION": "{+apiVersion}", // dynamic value in the header.
            "X-PLAN": "gold"                  // static value in the header.
          }
        }
      }
    }
  ]
}
For example, if the customer provides the following values:
{
  "domain": "example.com",
  "apiVersion": 3.0
}
Unito will perform the equivalent of this cURL command:
curl \
  --request POST \
  --header "X-API-VERSION: 3.0" \
  --header "X-PLAN: gold" \
  --header "Content-Type: application/json" \
  --data '{ <standard OAuth2 payload>, "domain": "example.com", "verbose": true }' \
  https://api.provider.com/oauth2/token
Additional variables for the Authorization Code Grant
Some providers send extra information in the Authorization Response's query parameters of the Authorization Code Grant flow.
For example:
https://integrations-platform.unito.io/credentials/new/oauth2/callback?code=...&state=...&extraKey=extraValue
Those extra information may be needed in the following
Access Token Request.
Therefore, they are made available under the authorizationResponse namespace,
and can be used as follow:
{
  "authorizations": [
    {
      "name": "oauth2",
      "method": "oauth2",
      "oauth2": {
        "tokenUrl": "https://api.provider.com/oauth2/token",
        "tokenRequestParameters": {
          "body": {
            "extraKey": "{+authorizationResponse.extraKey}"
          }
        }
      }
    }
  ]
}
Unito will perform the equivalent of this cURL command:
curl \
  --request POST \
  --header "Content-Type: application/json" \
  --data '{ <standard OAuth2 payload>, "extraKey": "extraValue" }' \
  https://api.provider.com/oauth2/token
Tweak the Refresh Token request
When needed, Unito makes an HTTP call to the tokenUrl you provided in your
configuration to refresh an existing access token.
The available options when tweaking the Access Token request are also available to refreshing an existing token,
under the refreshRequestParameters property of your OAuth2 configuration.
Multiple authorizations
You can define multiple authorizations in your .unito.json configuration file.
For example:
{
  "authorizations": [
    {
      "name": "apiKey",
      "method": "custom",
      "variables": {
        "apiKey": {
          "type": "password",
          "required": true,
          "label": "Your API key"
        }
      }
    },
    {
      "name": "u&p",
      "method": "custom",
      "variables": {
        "username": {
          "type": "string",
          "required": true,
          "label": "Your username"
        },
        "password": {
          "type": "password",
          "required": true,
          "label": "Your password"
        }
      }
    }
  ]
}
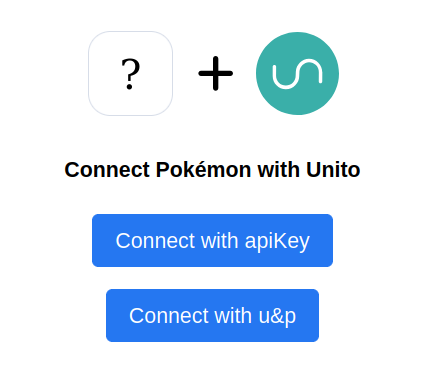
When clicking on Connect account on your connector in the Unito app, customers will see the following choices:

Some customers may decide to provide and API key while others might prefer to provide a username & password.
To support this configuration, your connector needs to be coded to receive the following data in the
X-Unito-Credentials header:
{
  "apiKey": "<api key collected from the customer>",
  "username": "<username collected from the customer>",
  "password": "<password collected from the customer>"
}
Furthermore, your connector must look at the values in apiKey, username and password to determine which
authorization the customer chose.
Custom authorization instructions
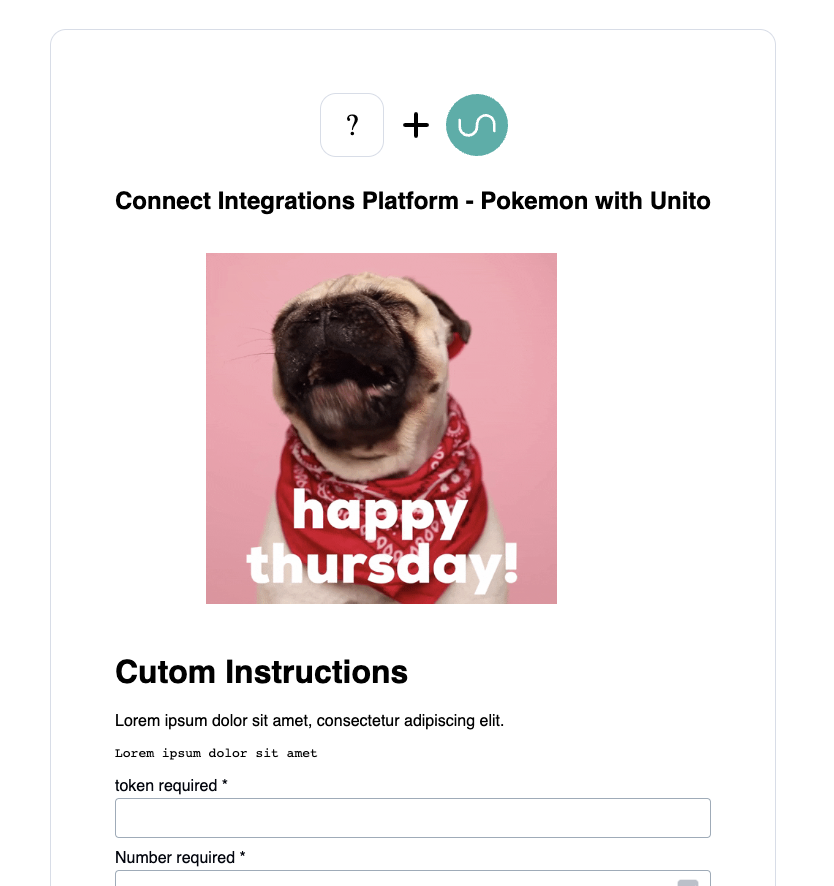
For private apps, the developer can provide custom authorization instructions. Those are limited to one image file and one markdown file per authorization type.
In order to add custom auth instructions:
- create an
assetsfolder at the root of your connector project - add one image and one markdown file to the
assetsfolder per authorization - each file size should not exceed 400 kb
- image files are limited to
.png,.jpgand.jpeg - both image and markdown file names should follow the pattern
instructions.${authName}.md, where${authName}is a name of the authorization that is going to use these instructions:
{
  "authorizations": [
    {
      "name": "apiKey"
    }
  ]
}
Example: instructions.apiKey.md, instructions.apiKey.png

In order to delete previously set custom instructions, delete the corresponding image and markdown files in the
assets folder.
Authorizations for development purposes
When your authorization is meant to be used for development purposes only, you can use the development property
as follow:
{
  "authorizations": [
    {
      "name": "apiKey",
      "method": "custom",
      "development": true
    }
  ]
}
This will ensure that this authorization won't be visible to customers, but can still be used in test accounts, for example.